Tutorial:: Make a Simple Baby Gym (part II)

Well, it’s not Monday anymore. It’s not even the day after Monday. I shouldn’t make promises about when I’ll make a blog post because then things get crazy and I can’t get to it. My husband is judging the International Science and Engineering Fair, and since he was going to be gone over my birthday (today) he had Hunter and I tag along for some rest and relaxation. We’re having a great time.

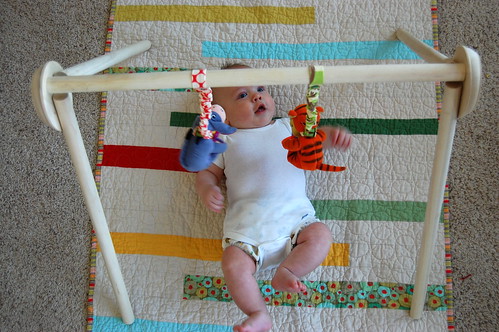
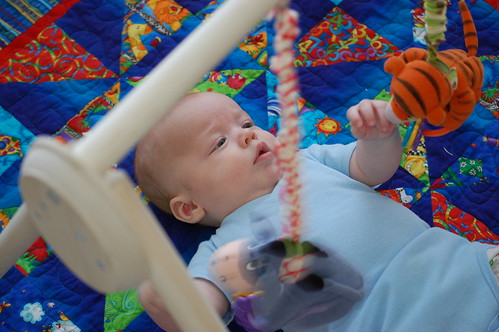
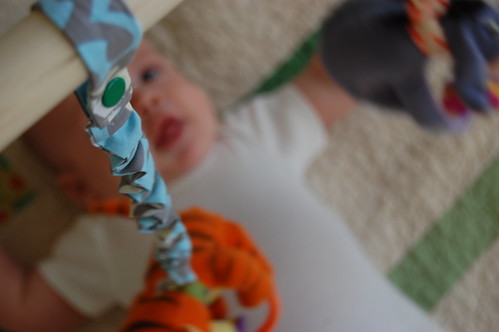
But, on with the reason for this post: springy-toy-dangler-things for the baby gym.

Now, the reason they need to be bouncy is so that they hang above baby’s cute little face so he can watch and bat at those toys, but once he actually succeeds in getting a hold of one he can have the ultimate in baby satisfaction by pulling it toward himself and stuffing it in his mouth.  It just wouldn’t be fun any other way.

Materials:

DSC_0026_2

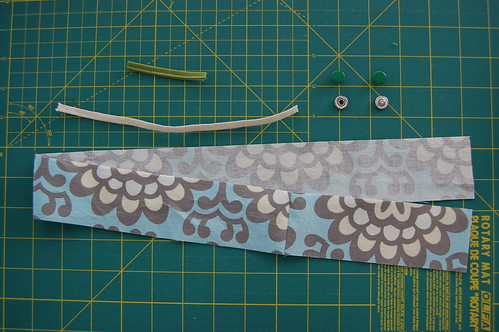
  • a 2″ x 28″ strip of cute fabric (I had to piece mine, which is totally acceptable here.)
  • 8″ piece of 1/4″ elastic
  • 2 1/2″ piece of ribbon or trim
  • a snap

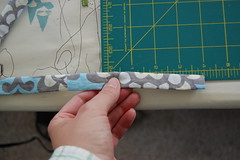
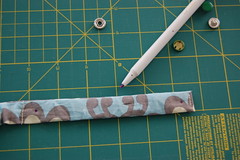
First, on each short end of your fabric press about a quarter of an inch of to the wrong side to finish the edges.

DSC_0027_2

DSC_0028_2DSC_0029_2

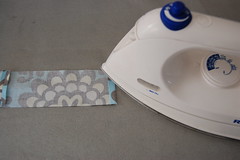
Then fold your strip in half lengthwise, right sides together and sew the raw edges with a 1/4″ seam allowance. Turn your tube right side out and press.

DSC_0031_2DSC_0032_2

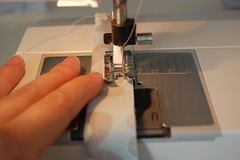
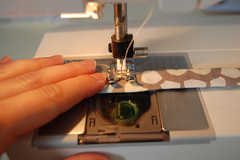
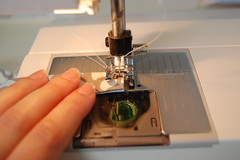
Now, with a safety pin on one end, thread your elastic through the tube feeling where the end is. When the end of the elastic without the safety pin is about 4 inches from the end of your tube of fabric, stop pulling and anchor your elastic there by sewing back and forth across the width of the tube, being sure to catch the elastic in the stitches.

DSC_0033_2

After one end of the elastic is anchored inside the tube keep pulling the other end through, scrunching up the fabric.

DSC_0035_2DSC_0036_2

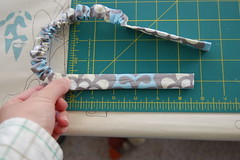
Once you feel it about 5 1/2″ from the other end of your fabric tube anchor it in place by sewing back and forth across the width of your fabric.

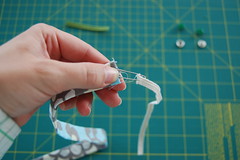
Now make your piece of ribbon or trim into a loop and stick the ends about 1/4″ into the end of your fabric tube that has 4″ without elastic.

DSC_0039_2DSC_0038_2

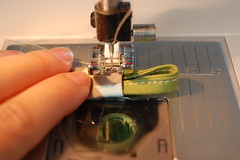
Sew it in there and also close up the other end too.

DSC_0041_2DSC_0042_2

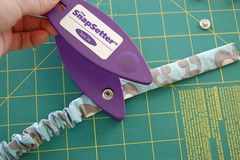
Put your snap on each end of the 5 1/2″ section that doesn’t have elastic.

DSC_0045_2DSC_0048_2

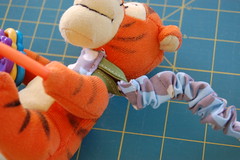
Thread the snap end through the loop to attach the strap to a toy. This design should fit on any toy. I wish I could say I came up with this ingeniously simple idea myself, but nope. I got it from Jessica’s pacifier clips, and she got the idea from this Etsy seller.

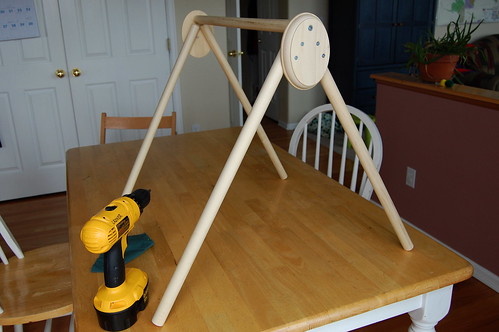
Now you can attach your toy to your gym and make another springy-toy-dangler-thing!

DSC_0050

Have fun, babies!  These work great to hang toys from just about anywhere you can think of. We’ve got them attached to the car seat and the stroller too.


Tutorial:: Make a Simple Baby Gym (part I)

baby gym

Here it is– a tutorial on how to make a simple baby gym. Feel free to make this just how I did, modify it, or whatever, but if you make one and show it to the internet, give me credit by linking back here.

Today I’ll show you the wooden part, then on Monday I’ll show you how to make cute springy-toy-dangler-things.

Materials: (you shouldn’t have any problem finding these at Home Depot, Lowe’s, or a craft store like Hobby Lobby)

materials- wood

  • 5 wood dowels 1″ in diameter and 24″ long
  • 2 wood oval rosettes 4″ x 6″ x 1″ (a circle at least 4″ in diameter should work too)

materials- screws

  • 8 #8 x 1 1/2″ wood screws
  • 2 #12 x 3 1/2″ wood screws

Tools:

  • saw to cut dowels to size if you don’t have them cut at the store
  • a protractor or quilting ruler to measure angles with
  • drill and bits
  • screwdriver (preferably with power)

First, mark all the spots you need to drill holes.

mark for pre-drilling

On your oval draw a line down the middle lengthwise. Measure 1″ down from the top along the line and make a mark. From this mark make a line angling out 30 degrees to the right. Now make a line angling 30 degrees to the left. On each of theses angled lines make marks 1 1/4″ and 2 1/4″ from the top. It should look like this:

baby_gym_drawing.png

On 4 of your dowels make marks 1/2″ and 1 1/2″ from the top. These will be you legs.

mark for pre-drilling

dowel_marks.png

Mark the center of each end of the fifth dowel. This will be the cross bar.

Now you need to pre-drill your holes. On the ovals drill the top hole with a drill bit just slightly smaller than the diameter of your long #12 screws (~3/16″). On the other four marks use a skinny bit just smaller than your #8 screws (~2/32″). Drill the holes on the ovals all the way through.

drill side pieces

Using the same small drill bit drill holes on the marks you made on the leg dowels being careful to only drill half way through.

drill dowels

On the cross bar use the bigger drill bit to drill into each end. On the front of each oval you can drill very shallowly with bigger drill bits to counter sink the screws so the heads will be flush with the wood.

Now, sand and finish all of your wood pieces any way you like. I just rubbed them with a natural paste wax. Unfinished wood really soaks it up, so it took several coats.

finishing

Screw your A-frame ends together. Start the 4 smaller screws on an oval until the tips are through on the back. Line up the two holes at the top of one of your leg dowels with two screw points and screw the screws the rest of the way. Lining them up can be a little tricky. It’s easiest if you line up your holes next to the screws and roll the dowel onto them. When screwing on you first leg it helps to put your other leg under the other side of the oval to keep it all at the same height.

line 'em up

put it together

Once you have both A-frames screwed together use the big screws to attach the crossbar to the legs.

use your knees to keep it steady

I had to use my knees to hold the dowel steady when I did the first one.

last screw

It’s done! Almost…

done!

Now you need a way to attach toys to it. Come back Monday for Part 2!

hung

hung:: handprinted curtains

The curtains are done!  The curtains are hung!

hung:: handprinted curtains

You know how when you’ve been working on something for a long time you kind of get sick of it?  I started printing these curtains in November I think it was, then put them away during the Christmas crazies, then got them out again last month.  I drew up the design several years ago when I saw the curtains here, so we’ve had a pretty long relationship, these curtains and I.  On Saturday after I clipped them to the rings strung on the curtain rod I was ready to call the whole thing a total bust, but now that I’ve had some time to breath from the rolling ink and stamping, rolling and stamping, rolling and stamping, and just sit back and look at them, walk past them, and pull their light airiness open and shut, they’ve grown on me. They make this new home feel a little bit more “me.”

 So, while I was in the hanging mood I turned to my stack of Karl Blossfeldt photogravures that has been gathering dust on the floor in my bedroom.

hung:: karl blosfeldt

It’s been nearly 8 months since we moved in here.  I guess it is about time I started hanging art on the walls and add a little more me-ness to this place, even though it is a rental.

 And, one more thing to go with this theme of hanging.  Our little baby has discovered his hands this week.

hung:: toys for the hand figure-outer

I’ve made baby gyms before, I remember one in particular I made for Jonah out of “crazy pipe” (bendable sprinkler pipe) covered with quilting fabric, but I think I’ve finally come up with a design I love.  I was going to just buy one, but I wanted something simple and wooden, and couldn’t find anything for a price I was willing to pay.  I went to Home Depot and found all the wood I needed on one isle.  Then I made springy-toy-dangler-things from some favorite fabric scraps and Hunter has been entertained for hours.  I exaggerate not!  The Tigger and Eeyore are favorites from when Brenna was tiny– I remember vividly the first time she reached for something, opened her little hand, grabbed it, and stuffed it in her mouth.  It was that skinny ring on that Tigger while we were driving back to Utah after living in Boulder, Colorado for the summer.  Here we are, in Colorado again, with a little baby, and Tigger is definitely his toy of choice.

 I’ll have a tutorial on making a simple wooden baby gym posted here soon!

getting out there

It seems winter came just as it was officially spring.  We had weeks of beautiful weather in the upper 60s and lower 70s in late February and early March, but Hunter was so freshly hatched then I just wasn’t up for much.  Once that spring equinox came and went we had snow almost every weekend.  Things have taken a long time to get green, but I think now it is safe to say spring has finally sprung.

house maps on the driveway

The driveway has become a maze of rocks and chalk-drawn rooms.

playing in the grass and dirt

The animal houses are extending into the lawn, too.

strawberry blossoms

Along with 4 rabbits out front we spied the first strawberry blossoms.  Now to figure out how to keep the strawberries safe from all the rabbits.

smells good

And we’ve got lilacs in bloom!  I didn’t miss the biting gray misty gloom of Ohio in winter, but I must say now that it’s spring I’ve been longing to see redbuds and magnolias crowned in pink, so the lilacs in our backyard make me smile.

If you’re wondering where we are, we’ll be outside.