for those of us who are large and in charge (or– how to make a maternity skirt)

So, I’m feeling pretty huge.  Or, more accurately put– I am huge.  I do not own a scale and seldom step on one unless I have to.  My appointment with my midwives yesterday was one of those must-stand-on-the-scale moments.  Geesh!  I knew that my maternity clothes that were staples last time around were feeling tight, but it was quite a rude awakening to discover that I’ve gained about as much weight in the 28 weeks I’ve been pregnant as I did my entire pregnancy with Ian.  So, I could curl up and cry like my hormone bathed instincts direct, or I could sew myself some clothes.  And sew them I must because I don’t want to shell out the money to buy cute ones from the Gap and I am just tired of tight, thin fabrics that highlight every waistband  and the exact shape of my bra and all the squishiness it needs to get through to stay put.  Maybe with the return of ’80s leggings will come the maternity mumu?  Oh, I guess that would be a bit cold through a winter in Colorado.

My friend Jessica has been doing some maternity sewing (and she got a new sewing machine).  These tops are cute, and definitely on my list of things to try.  Nothing clingy.  Perfect.  I’ve also been dreaming about this book.  I mean, don’t you just want to live in a Japanese craft book?  Maybe I should just buy it — but would anything possibly fit?  I’m not sure I’m Japanese craft book dimensions these days.  (edit: In a fit of panic that someone else would buy it, I DID just buy it.  Thank you all of you who have filled up my PayPal account by buying things from my shop!!)  I’m also considering buying this pattern— it is for knit fabric which has the potential for the clingy revelations I’m ready to avoid, but I like the cross wrap thing, and the nursing convenience is definitely a bonus–you know, for those still pretty humongous days once the baby is born and nursing happens constantly.

Anyway, the most comfortable thing I have to wear is the skirt I made this summer, but one skirt can only go so far.  I needed another.  I know there are other blogging mamas out there that might need some new clothes too, so I thought I’d take some pictures as I sewed and show you what I did.  I’m not really impressed with my tutorial photo taking abilities, but hopefully you’ll get the idea.

To start with, I got 2 1/2 yd. of fabric for the skirt and 1/2 yd. of a stretchy knit for the waistband.  Then I drafted my pattern with the help of Amy’s 5 minute skirt tutorial.   Instead of doing the waist measurement around my waist, which can’t really be called a waist, I measured around UNDER my belly– about where my hip bones stuck out once upon a time.  Also, for measurement B (refer back to Amy’s instructions) she says to add 22 inches to your waist measurement.  That was way too much– partly because I started out with bigger-than-waist waist measurements and because both fabrics I’ve used (denim and velveteen) had a bit of structure to them.  So, draft your pattern, cut your fabric, sew it together, finish your seams, press it, and turn it right side out.

Once you’ve done that, you can make your super stretchy maternity waist band.  I used the full half yard of rib knit I bought, which makes about a 9 inch waistband.  I am not much of an under the belly maternity bottoms wearer.  I can’t seem to keep those things up and having to constantly pull my pants up drives me batty.  I like to have some coverage, and some to fold over.

maternity skirt making

Cut your stretchy knit fabric an inch or two shorter than your waist (underbelly) measurement.

maternity skirt making

Then sew the two short sides together to made a big tube, wrong sides together if your fabric has a wrong side.

maternity skirt making

Fold your tube in half, opening up and matching your seams, wrong sides together.  Now you’ve got a doubled tube with raw edges on one side and a folded edge on the other.  Use pins to mark the fold directly across from your seam and on the center of each side.   Use pins to mark the center of each side of your skirt, too.

maternity skirt making

maternity skirt making

Stretch your waistband over the top of your skirt, matching the two raw edges of waistband with the raw edges of your skirt and lining up your marking pins.  Pin at those marks first, then  stretch and pin to fit in between those pins.

Now, sew it all together with the knit fabric on top so you can stretch as you go.  It’s really easy.  Don’t worry too much about getting all your stretching perfectly even.

Try it on, hem it how you like, and you’re good to go!

maternity skirt on

(Blurry photo courtesy of the 6 year old.)



still life revisited::1

still life revisited

I loved the still life project too much to just be done with it, and now I have proof that my art stuff really is (mostly) unpacked.  I got my light box put back together.  This nomad summer of ours didn’t put an end to my collecting of seeds and stones.  Aside from filling jars and shadow boxes with my bounty, I have been setting up new still life scenes in my head while I lie awake in bed at night. This one has maple seeds plucked from my favorite tree right outside the kitchen window in our Ohio house.  Hurriedly picked as we were loading kids in the car to drive away.  There’s a big New Hampshire granite beach stone back there– one that showed up many times this past February, a driftwood stick gifted to me by a special friend before we both left our old homes, and three small stones from the ocean shore by San Luis Obispo gathered this summer when I visited Barry there.  The stones covered in felt– those are from our new backyard here.  The kids and I collected stones and felted away last night out of necessity because this week I discovered resurrection fern and have been mulling over images of stones covered with felt and crocheted lace almost obsessively.  I mean, round, smooth stones covered in intricately crocheted thread?  You can’t get much cooler than that.

 Still life photos won’t be daily, but when the inspiration strikes they’ll be here.  I’m excited to set up my little worlds with some of my favorite things.  I can orchestrate something peaceful and pretty and quiet and clean– even if it is in an isolated little white box.

I made something today

Have you heard of the book Artisan Bread in Five Minutes a Day?

i made something today

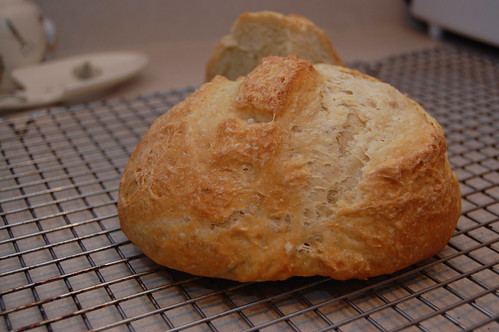
Okay, so I know if you’re an Angry Chicken reader you most likely have.  I just have to chime in my two cents that you simply must get your hands on a copy.  I bought one while we were living in a little apartment in Alabama this summer– without a good mixer or bread maker.  With the recipes in this book you need neither a heavy mixer or a bread maker, just a good sized bowl and a wooden spoon or (my preference) a sturdy rubber spatula.  The dough doesn’t even need kneading!  Just mix your ingredients, let it rise for a while, then pop the dough in the fridge.  When you’re ready for some warm, crusty bread, some naan, or even some sinful cinnamon rolls, just break out your bowl of dough and you’re good to go.  We had a long, busy day at the Denver Museum of Nature and Science today  and the last thing my tired pregnant body wanted to do was make dinner.  The dough in the fridge came to the rescue!  In less than an hour we had spaghetti and 3 crusty loaves (I hurried and took a picture before they were all gone) filling our home with delicious smells.

I don’t use the recipes for our everyday bread.  I haven’t been able to get the whole wheat varieties to turn out quite to our liking, but for dinner bread or for a sweet morning treat, the white bread recipes are amazing and super easy.

Anyway– it made me feel a teensy bit creative today.

The House

Last night’s post was really long.  Tonight is going to be kind of listy because I’m a tired pregnant lady.

this new place we live

 This, here, is our new living room, the center of our lives because it is where the books live.  True, the place where the food is is almost as important, but it seems much more time gets spent here.  Barry ended up having to find us a house all by himself (I am a lucky girl to have such a wonderful husband whom I could trust to singlehandedly find us a place to live).  It is in the middle of suburbia, in the heart of a sea of houses– but despite that, it is proving to be the exact spot we needed to be, even without a place to rebuild Croker Heights or keep any backyard chickens.   Now for the list of reasons why:

-We live on a culdesac with at least 40 kids– many near our kids ages and equipped with bikes and scooters galore.  Perfect.

-The neighbors are super friendly. Perfect.

-Our next door neighbors homeschool, have a daughter Brenna’s age and a daughter that teaches piano lessons.  (something I’ve decided to delegate)  Perfect.

-Colorado is hugely supportive of alternative education and I have found that my oft voiced dream of just one day a week school really exists, and we moved less than a mile from just such a place!  I can go grocery shopping with just two kids yet still have all the benefits of homeschooling!  Perfect.

-There are parks and paths for my morning walks through open space.  Just right.

-Barry can ride his bike to work and be home in time for dinner.  Perfect.

So, I am happy.  I wish my art stuff could unpack and organize itself, but other than that things are settling nicely.

For more pictures check here.