So, I’m feeling pretty huge. Or, more accurately put– I am huge. I do not own a scale and seldom step on one unless I have to. My appointment with my midwives yesterday was one of those must-stand-on-the-scale moments. Geesh! I knew that my maternity clothes that were staples last time around were feeling tight, but it was quite a rude awakening to discover that I’ve gained about as much weight in the 28 weeks I’ve been pregnant as I did my entire pregnancy with Ian. So, I could curl up and cry like my hormone bathed instincts direct, or I could sew myself some clothes. And sew them I must because I don’t want to shell out the money to buy cute ones from the Gap and I am just tired of tight, thin fabrics that highlight every waistband and the exact shape of my bra and all the squishiness it needs to get through to stay put. Maybe with the return of ’80s leggings will come the maternity mumu? Oh, I guess that would be a bit cold through a winter in Colorado.
My friend Jessica has been doing some maternity sewing (and she got a new sewing machine). These tops are cute, and definitely on my list of things to try. Nothing clingy. Perfect. I’ve also been dreaming about this book. I mean, don’t you just want to live in a Japanese craft book? Maybe I should just buy it — but would anything possibly fit? I’m not sure I’m Japanese craft book dimensions these days. (edit: In a fit of panic that someone else would buy it, I DID just buy it. Thank you all of you who have filled up my PayPal account by buying things from my shop!!) I’m also considering buying this pattern— it is for knit fabric which has the potential for the clingy revelations I’m ready to avoid, but I like the cross wrap thing, and the nursing convenience is definitely a bonus–you know, for those still pretty humongous days once the baby is born and nursing happens constantly.
Anyway, the most comfortable thing I have to wear is the skirt I made this summer, but one skirt can only go so far. I needed another. I know there are other blogging mamas out there that might need some new clothes too, so I thought I’d take some pictures as I sewed and show you what I did. I’m not really impressed with my tutorial photo taking abilities, but hopefully you’ll get the idea.
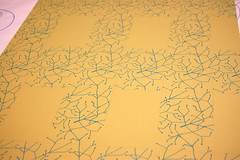
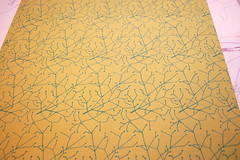
To start with, I got 2 1/2 yd. of fabric for the skirt and 1/2 yd. of a stretchy knit for the waistband. Then I drafted my pattern with the help of Amy’s 5 minute skirt tutorial. Instead of doing the waist measurement around my waist, which can’t really be called a waist, I measured around UNDER my belly– about where my hip bones stuck out once upon a time. Also, for measurement B (refer back to Amy’s instructions) she says to add 22 inches to your waist measurement. That was way too much– partly because I started out with bigger-than-waist waist measurements and because both fabrics I’ve used (denim and velveteen) had a bit of structure to them. So, draft your pattern, cut your fabric, sew it together, finish your seams, press it, and turn it right side out.
Once you’ve done that, you can make your super stretchy maternity waist band. I used the full half yard of rib knit I bought, which makes about a 9 inch waistband. I am not much of an under the belly maternity bottoms wearer. I can’t seem to keep those things up and having to constantly pull my pants up drives me batty. I like to have some coverage, and some to fold over.
Cut your stretchy knit fabric an inch or two shorter than your waist (underbelly) measurement.
Then sew the two short sides together to made a big tube, wrong sides together if your fabric has a wrong side.
Fold your tube in half, opening up and matching your seams, wrong sides together. Now you’ve got a doubled tube with raw edges on one side and a folded edge on the other. Use pins to mark the fold directly across from your seam and on the center of each side. Use pins to mark the center of each side of your skirt, too.
Stretch your waistband over the top of your skirt, matching the two raw edges of waistband with the raw edges of your skirt and lining up your marking pins. Pin at those marks first, then stretch and pin to fit in between those pins.
Now, sew it all together with the knit fabric on top so you can stretch as you go. It’s really easy. Don’t worry too much about getting all your stretching perfectly even.
Try it on, hem it how you like, and you’re good to go!
(Blurry photo courtesy of the 6 year old.)
