Well, it’s not Monday anymore. It’s not even the day after Monday. I shouldn’t make promises about when I’ll make a blog post because then things get crazy and I can’t get to it. My husband is judging the International Science and Engineering Fair, and since he was going to be gone over my birthday (today) he had Hunter and I tag along for some rest and relaxation. We’re having a great time.
But, on with the reason for this post: springy-toy-dangler-things for the baby gym.
Now, the reason they need to be bouncy is so that they hang above baby’s cute little face so he can watch and bat at those toys, but once he actually succeeds in getting a hold of one he can have the ultimate in baby satisfaction by pulling it toward himself and stuffing it in his mouth. It just wouldn’t be fun any other way.
Materials:
- a 2″ x 28″ strip of cute fabric (I had to piece mine, which is totally acceptable here.)
- 8″ piece of 1/4″ elastic
- 2 1/2″ piece of ribbon or trim
- a snap
First, on each short end of your fabric press about a quarter of an inch of to the wrong side to finish the edges.
Then fold your strip in half lengthwise, right sides together and sew the raw edges with a 1/4″ seam allowance. Turn your tube right side out and press.
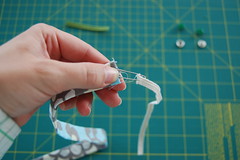
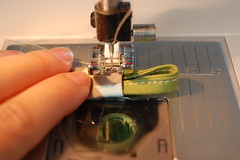
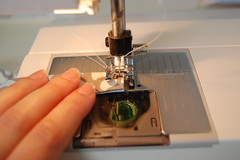
Now, with a safety pin on one end, thread your elastic through the tube feeling where the end is. When the end of the elastic without the safety pin is about 4 inches from the end of your tube of fabric, stop pulling and anchor your elastic there by sewing back and forth across the width of the tube, being sure to catch the elastic in the stitches.
After one end of the elastic is anchored inside the tube keep pulling the other end through, scrunching up the fabric.
Once you feel it about 5 1/2″ from the other end of your fabric tube anchor it in place by sewing back and forth across the width of your fabric.
Now make your piece of ribbon or trim into a loop and stick the ends about 1/4″ into the end of your fabric tube that has 4″ without elastic.
Sew it in there and also close up the other end too.
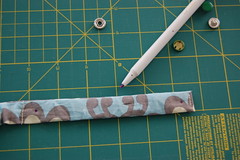
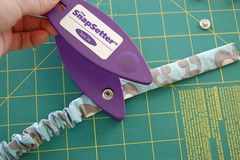
Put your snap on each end of the 5 1/2″ section that doesn’t have elastic.
Thread the snap end through the loop to attach the strap to a toy. This design should fit on any toy. I wish I could say I came up with this ingeniously simple idea myself, but nope. I got it from Jessica’s pacifier clips, and she got the idea from this Etsy seller.
Now you can attach your toy to your gym and make another springy-toy-dangler-thing!
Have fun, babies! These work great to hang toys from just about anywhere you can think of. We’ve got them attached to the car seat and the stroller too.






Wow, that is awesome! It is cute and (relatively) easy to make. I don’t think we will have another little one – but this is a great gift to make for new arrivals. Thank you for the tutorial!
So much awesomeness. Gosh you could use those bouncy toy connector things on car seats and strollers too. Love!
Seedpod Books and Art » Blog Archive » Tutorial:: Make a Simple Baby Gym (part I)
Baby Patterns for Sewing Mamas « Roots & Wings
Getting crafty: baby gym | Delight-Filled Leaves Art