some nest-feathering, but with pillows

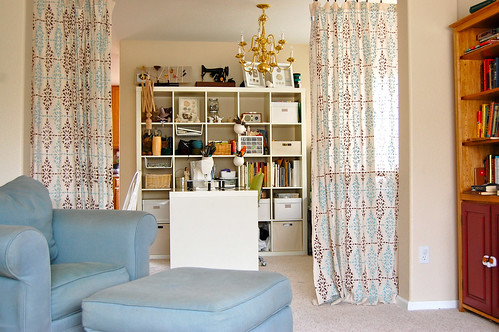
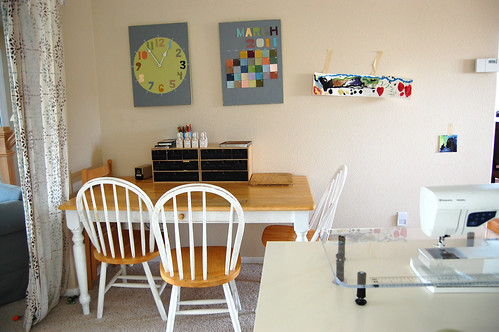
I’ve been having fun redecorating the family room walls, but I’m not quite ready to take pictures of it all and say I’m done.   I decided today that I need to do something different in my fireplace mantel/ cubby thing so I’ve been looking for inspiring mantel arrangements and dreaming up what I could do with what I already have instead of the family photos that have been there for a year and a half.  (And, to be honest taking photos of just one corner of the room is much easier because I can keep the baskets of unfolded laundry and explosion of k-nex behind me.)

new pillow and wall quotes

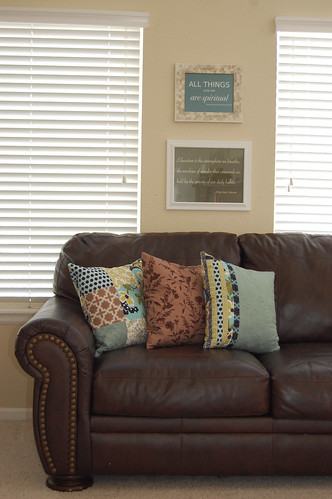
What I can say is done is the sewing of these pillows and some quotes to hang on the wall.  I have a friend who had a pretty quote printed as a photo at Costco, framed it, and gave it to me for Christmas– and I thought it was genius!  So, I took some sayings I’ve wanted displayed in my house somehow, made them into big images using Inkscape (which is kind of like Adobe Illustrator, but free), printed them as photos at Costco, and framed them.  They’ve been done for a while.  I just decided they should go here.

new wall quotes

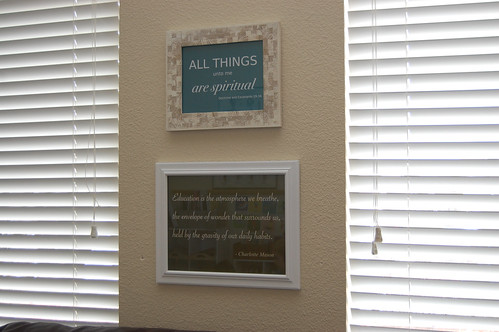
The top one is from Doctrine and Covenants 29:34 where the Lord says “All things unto me are spiritual.”  It’s a good reminder when I’m cooking dinner, picking up toys, helping with math, ignoring laundry that even all the mundane things that need my attention have a purpose–  they’re spiritual.  The second is a quote from Charlotte Mason that says “Education is the atmosphere we breathe, the envelope of wonder that surrounds us, held by the gravity of our daily habits.”

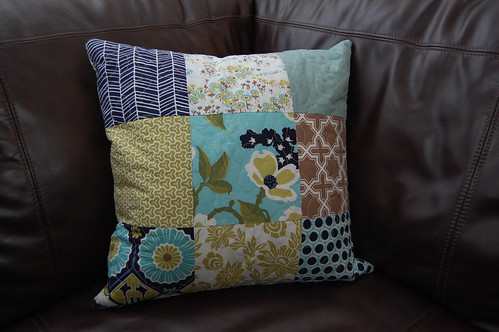
The 2 colorful pillows were so fun for me to make.  They’re basically 4 little quilts, pieced and quilted and turned into pillows.  Here’s one side of the first one:

one side of pillow #1

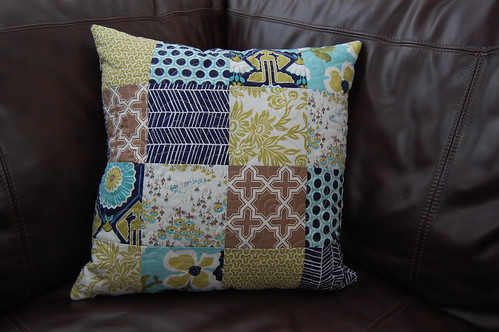
I used the Joel Dewberry Modern Meadow fat quarters I had been saving to make another quilt like this.  I never was really going to get around to making that quilt, and I decided this is a much better way to enjoy the fabric anyway.

another side of pillow #1

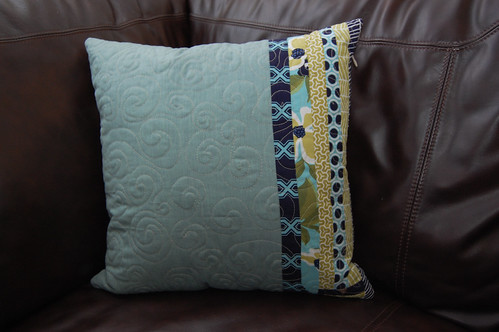
This is the other side.

swirly quilting

I got a little crazier with the second pillow.

another side of pillow #2

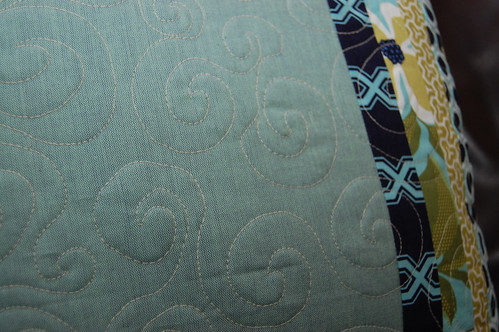
This one is just quilted with straight lines.

one side of pillow #2

I loved making these because I got to do everything involved in making a quilt, but on a much more immediate, instant gratification scale– and I can see and enjoy them every day.

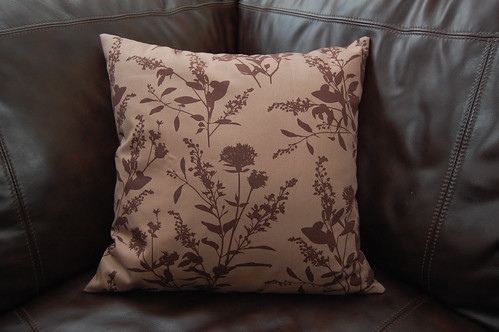
I also used some home decorator weight fabric I had in my stash to add one plain pillow.  It took all of 20 minutes (invisible zipper and all).

the brown pillow

Here’s all 3 again in a different corner:

all 3

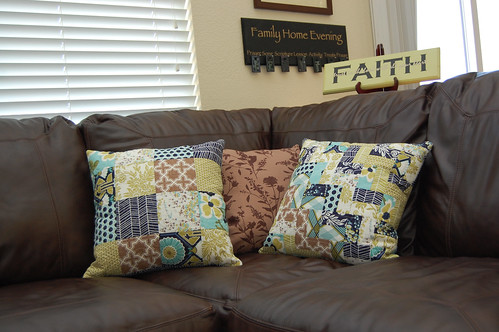
Obviously these are usually on the floor being jumped on or laid on, but they looked pretty here for a little while.   I’m hoping at some point this year I can get a few Rollie Pollies made for jumping and rolling and reading.  We’ll see.  I probably really should be replenishing my supply of baby girl things– and will probably be more excited about doing that as the days go on.

So, anyone have some favorite mantel photos they want to send me links too?  Feel free to leave them in the comments!

Art room tour

Want to see into my art room?  I tidied it last Saturday and it’s stayed in pretty good shape for a whole week!  I am certainly organizationally challenged and always have been.  In high school, my best friend always bought me some containers and went through and decluttered and cleaned up my bedroom for my birthday.  Now I live with a different best friend and he generally has a big hand in helping me keep my space under control (like throwing a quilt-in-progress over my drafting table to cover the mess).

But this time I did it all by myself!  This is huge!

from the living room

This is the view from the front room of our house.  Our creative space is what would normally be a formal dining room, but I need to be able to work on making things right in the heart of our home throughout the day, so this is the perfect place to have my craft space.

my side of the room

I’ve got a big Expedit shelf from Ikea with a desk attached.  There’s plenty of room for bins of fabric, boxes of precious metal clay stuff, printmaking supplies, knitting stuff, other crafty odds and ends, our little Tivoli stereo, and some pretty things too.

a little look at my shelves

I’ve got some other Ikea cup things to hold pencils, markers, scissors, pliers– you know, all that stuff that needs to be right there for the taking.

drafting table

In the big window is my drafting table.  It was a dumpster find of Barry’s when we were in college and I seriously could not imagine life without it.  It is easily one of my very favorite pieces of furniture in our house.  My gecko lives in the corner over my Gocco and block printing stuff.  Underneath my drafting table are rolls of paper, interfacing, contact paper, and baskets of mending, batting and foam.  Oh, and a couple of quilts destined for Humanitarian Services.

perched in the window

Look up, and there are the birds!

the kids' side

Opposite the window wall is the kids’ drawing table.  One of these weekends we’ll make a big magnet board so that Ian won’t need to tape his paintings to the wall.

Here are a few more pictures for good measure.

on the top

I love the old Singer from Barry’s aunt.  It needs rewiring to work, but it’s really fun to look at anyway.

in one cubby

A shelf of pretty stuff.  I spun thread and then needle punched the fabric for that little bear years ago.  I still really like him.

pretty fat quarters

I love these under-shelf wire baskets I found at the Container Store.

sneak peek

And here’s a sneak peek to another room I’ve been rearranging and hanging new artwork in.  I think I’ll be ready to show it to you next week.

thankfully, my husband is an engineer

So, if you’ve read my blog for any amount of time you’ve probably noticed that often when I show you a finished project I say something like, “I’ve been making this in my mind for a long, long time,” or “I’ve been dreaming this up for a couple of years,” or something like that.

Well, this is no exception.

birdmobile

We were living in a tiny apartment in Alabama in the beginning of our summer of transition to Denver when a good friend sent me this link with exclamation points and excitement that I HAD to make one– it made her think of me.  And I completely agreed that I NEEDED one somewhere in my new house, whenever it would be that I got settled.  Since we’ve been here (for 2 1/2 years) I’ve been imagining those little birds in corners and bedrooms and had settled on just the place– a corner of the front room above the love seat that needed a little color.

the blues and grays

But now that it’s made it is a little big and I’m afraid it would swing into the blinds or the bookshelf and be too much of a temptation for the climbing 2 year old to bat at.  At the moment it is hanging in the doorway between the front room and my art room, but I’m thinking today I’ll put up a hook over my drafting table and let the birdies live there.

a feat of engineering

I’ve been on a bit of a spring-cleaning/ redecorating kick lately with a long mental list of things I want to do around the house and this was one of those things on the list.  In a burst of spontaneity the other morning Jonah and I went through my scrap bin with bird pattern in hand and found pieces that were the right size, cut them out, matched them up, and whipped up some birds.  That went really fast– especially with his help stuffing them.  With all that built up momentum I gathered some sticks at the park the next day and started sewing birds to branches– only to have them hang upside down like bats.  I discovered I needed to put some weight in the bottom of the birds so they weren’t top heavy and to use screw eyes to secure string to the branches so they wouldn’t twist.  I dedicated the next day to ripping out tail seams and spooning in rice, then attempting  to hang and balance it all again– to no avail.

Finally, when Barry had a free night we tried it all again.  We found a few helpful things:

-Attach the birds to the branch with wire instead of sewing them on so they are easy to reposition.

-Thicker branches twist and roll less than skinny ones.

-We ended up using thin picture wire instead of invisible thread to hang the branches because it was more stable.

-Once we found the perfect bird positions we squeezed a little hot glue in to keep them there.

So, now it’s done and so fun to look at!  When my art room is all decluttered and organized I’ll need some photo documentation, so I’ll show you its permanent home then.


Barry had been dreaming of getting a GoPro for Christmas– but I don’t think he thought he’d really get one.  I gathered up some of my SweetPod money and splurged on one for him.  He’s made videos of himself uni-cycling, jumping on the trampoline, and sledding.  He also had the bright idea as he was leaving the house one day to set it up in time lapse mode in the living room just to see what really goes on when we’re not at home.

Ellie is NOT allowed on the furniture and never is on it when we’re in sight.  I guess when we’re gone she rules the roost.