the budding seamstress

budding seamstress

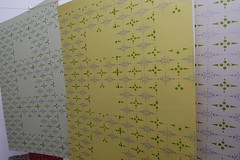
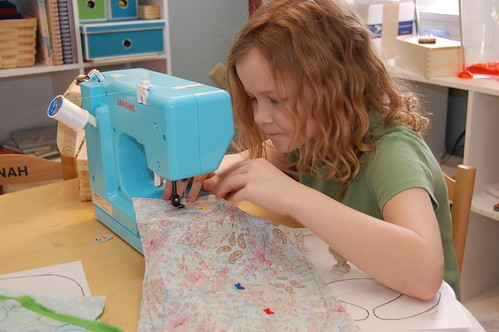
Brenna got a little sewing machine from Santa. Once a week or so she’s been setting it up and working on the little lessons in Winky Cherry’s My First Machine Sewing Book. The genius of this book is that it has kids starting by sewing on paper, just tracing lines. Brenna loved the curvy lessons so much she did them several times. I was pretty surprised at how quickly she really caught on to steering. I had taught her to sew a little bit on my sewing machine just doing double layer flannel baby blankets which just entailed long straight lines, but watching her seam allowance was tricky for her to do. Punching holes on a drawn line with her needle has been much more fun for her. Since she’s mastered pivots and curves I thought we’d break out Amy’s Bend the Rules Sewing. I have several baby gifts to get made, so I thought I’d enlist some help. I made some bibs a while ago and just can’t get over how cool it is to trace the pattern onto a rectangle of fabric, sew on the line, and trim after sewing. I copied the patter on a few pieces of paper first, and once Brenna had perfected the curves she wet at it on fabric. Having a layer of flannel was perfect because it has enough grab that she didn’t have to think about her layers shifting because having them pinned bugged her. I helped a tiny bit with trimming them and turning the right side out. I also lined everything up right for her to hammer the snaps on, but for the most part she did them by herself. She can thread her machine and wind bobbins and everything.

girly

new bib

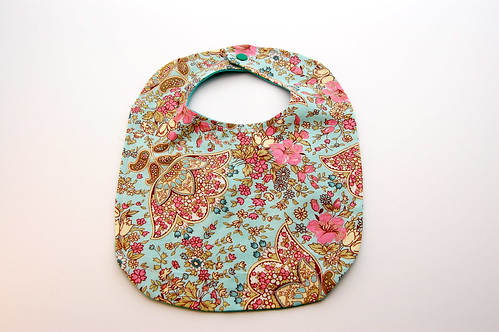
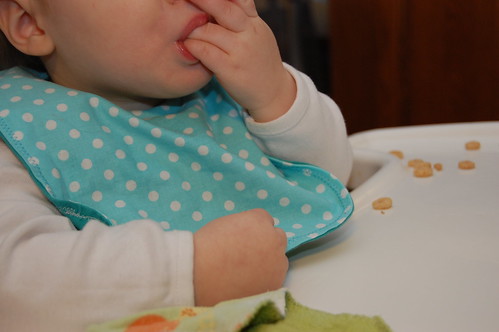
She’s got two done. We’ll keep this polka dot one forever and ever. Hopefully someday her babies will wear it while eating Cheerios.

I just think she is so awesome– just the coolest kid ever!

ginko leaf necklace

It’s been a long time since I’ve done anything with my precious metal clay experiments. I made necklaces for my moms for Mother’s Day out of leaves. I got the pmc paste and painted it on the veiny side of little leaves and let it dry. After about a dozen layers of clay paste I added a loop of clay to the top, then fired the leaves in my little hot pot. The real leaves burned away leaving perfect little fine silver leaves. Once I did two leaves I just couldn’t stop. They were so easy and sew delicately beautiful. Well, several of those little leaves have been sitting in a little container up in my art room for a long, long time.

ginko necklace

I’ve also had some strings of beads waiting to be combined with my little leaves to make some finished jewelry. The first one I made was for my sister in-law in Idaho– and it got lost in the mail. I haven’t made any for myself because Ian is in the necklace-pulling-off stage, so it just hasn’t seemed worth it, but the other day I just couldn’t stand it any longer. I had to try hooking some beads together and dangling some little leaves from them.

ginko necklace

I really, really like it. The beads are jadeite stones and the wire, chain, and jump rings are all sterling silver.

ginko necklace

I’ve been trying to just wear it around, but Ian can’t keep his hands off of it. I guess it’s a date necklace for now.

Oh and I found a photo (from my old camera) of the lost-in-the-mail (which is our fault because we sent it to the wrong address) necklace. I had never seen tulip tree poplars until we moved here to Ohio. Our neighbors have 2 of them, so all spring I was picking the baby leaves off of the branches that hung over to our side of the fence. They are such a pretty shape.

tulip tree leaf

This one has green German glass beads and sterling silver beads on a sterling silver chain. I hope whoever ended up with it opened it and likes it!! Tiffany, a new one will be coming soon!

Play with Your Cousins

Before it gets too far past Christmas I need to post about some hand made gifts. These are the only thing I managed to get made this year. After seeing Amy’s Aunt Sarah Dolls I’ve had this idea in my head and finally got it out this year.

play with your cousins play with your cousins


They are hilarious. I drew the bodies, then had the kids color their own. I just used our printer to copy them onto the injet iron on stuff I found at Hobby Lobby. Simple enough. It did take me quite awhile to get them done, though. I made 4 sets, so that was printing, ironing on, cutting, sewing, stuffing (my mom was visiting, so she actually did that part),and closing up– times 16. Anyway, I don’t think about things that way when I embark on a project, so things always take me longer than I think they will.


I kept a set. It is pretty funny to see Ian chewing on himself!

4 hours a week!!

On Mondays from 12:30 to 4:00 or so I have a babysitter to watch the kids so I can hide in my art room. Here’s what I did today:

gocco pattern design


I’ve filled up all the journals I didn’t sell last year (last year?! that long ago? yikes!), so I need a new one. I drew up a design on graph paper and used my little gocco printing press and stamp kit to print my big sheets of paper.

first printstamping registration setupgocco stamp registration marksgetting there


I’ve been thinking and thinking about how to get patterns to repeat right, how exactly I’d go about stamping designs without smearing ink, what kind of jig I’d need to get things lined up right for a long, long, time.  I have printed this paper a gazillion times in my head.  I used mat board strips with marks that had corresponding marks on my stamp screen, then held everything in place with pretty blue masking tape.  It worked like a charm!  I just barely mis-marked everything for the vertical repeats, but oh well.  It’ll all be totally perfect next time I try it.  And it looks hand made, right?  That’s my mantra.  Perfectionism is out the window.

Not bad for a days work! This certainly makes for a happy mama.